User Interface (UI) design is the bridge between users and digital products. It shapes interactive experiences that are visually appealing and easy to use. A well-thought-out UI helps users achieve their goals smoothly while also representing the brand’s identity.
For beginners, learning UI design can seem daunting. But breaking it into clear steps simplifies the process. This guide walks you through each phase—from research to deploying your final design. Whether you’re a new designer or improving an existing product, this roadmap will help you create user-friendly, functional interfaces.
What is UI Design?
UI design focuses on crafting digital spaces that balance creativity with usability. It goes beyond aesthetics by combining design elements with practical features to ensure smooth user interactions.
UI design revolves around three main principles:
- Aesthetics: Use design elements like colors, typography, and imagery to create visually cohesive interfaces.
- Usability: Simplify navigation to accommodate users with varying tech skills.
- Interactivity: Make user actions feel natural, with proper responses to inputs.
From apps to websites, the goal remains: create interfaces that look great, are accessible, and help users complete tasks effortlessly.
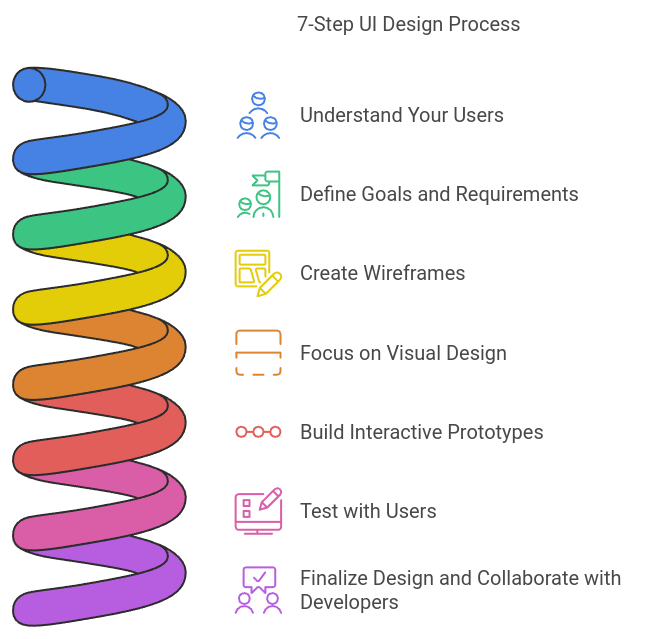
The 7-Step UI Design Process

1. Understand Your Users
Start by knowing your audience. Research is critical to identifying user goals, behaviors, and problem areas.
- Methods: Use surveys, interviews, and observation to gather data about user needs.
- Tools: Build user personas to represent your target audience’s main traits, pain points, and goals.
- Journey Mapping: Visualize the steps users take to interact with your product. This helps anticipate challenges and refine pathways.
A deep understanding of users ensures your design aligns with their expectations.
2. Define Goals and Requirements
Once you have user insights, determine what your project needs to accomplish.
- Project Goals: Set clear objectives, such as improving navigation or increasing engagement.
- Prioritize Features: focus on core features that directly solve user pain points or enhance functionality.
- Engage Stakeholders: Collaborate with developers and other team members to balance creativity with feasibility.
Precise requirements create a solid foundation for your work.
3. Create Wireframes
A wireframe serves as the blueprint for your design. It shows the structure and placement of elements without diving into visual details.
- What Are Wireframes?: Simplified layouts that focus on functionality and hierarchy.
- Why Use Wireframes?: They allow teams to discuss and refine design ideas without getting distracted by colors or fonts.
- Iterate: Early feedback during this stage can save time and reduce errors later.
Wireframes act as a visual guide and create alignment among team members.
4. Focus on Visual Design
It’s time to breathe life into your wireframes by adding visual elements. A cohesive and appealing design is vital to engaging users.
- Color Palette: Choose colors that reinforce the brand identity and enhance readability.
- Typography: Use clear and consistent fonts to guide users smoothly.
- Icons and Images: Incorporate graphics that are not only attractive but functional. Icons should clarify actions, and imagery should complement the interface.
Visual design creates an emotional connection while maintaining usability.
5. Build Interactive Prototypes
Prototypes transform flat designs into interactive experiences. They simulate how the interface will look and behave in real life.
- Why Prototypes?: They allow you to test navigation, transitions, and functionality before development begins.
- Recommended Tools: Figma, Adobe XD, or Sketch can create clickable and interactive designs.
This step helps identify any usability issues before moving on to development.
6. Test with Users
Testing ensures your design works as intended. Direct user feedback uncovers hidden usability challenges.
- Testing Techniques: Conduct usability tests where users interact with your prototype. Record their experience and collect verbal or written feedback.
- Iterate and Improve: Pay attention to common friction points and refine the design based on testing insights.
Each revision brings you closer to a user-centered interface.
7. Finalize Design and Collaborate with Developers
Once the design is complete, you should hand off your work to the development team for execution.
- Documentation: Provide detailed style guides, component libraries, and behavior notes.
- Handoff Tools: Apps like Zeplin or Figma simplify communication between design and development teams.
A smooth handoff ensures your final product stays faithful to the original design.
Key Takeaways for Your UI Design Journey
Creating great user interfaces requires careful planning and iteration. Research your users, prioritize their needs, and refine your designs through feedback. Collaborate effectively with your team to ensure a seamless transition from concept to code.
Remember, no design is perfect on the first try. Embrace testing and revisions to arrive at a product that users love. With time and practice, you’ll master the craft of UI design.


Leave A Comment